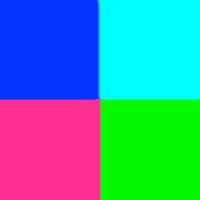
Emojisaic is a Ruby program that takes still images and animated gifs and replaces all of the pixels with emojis. From this:
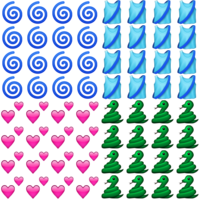
To this (just a few sample frames, the full version is 8mb):
I’ve also collected a few more examples on tumblr, and for instructions on cloning the repo and making your own Emojisaic images and gifs visit this Github page.
WHY
I’d worked with RMagick for a few Twitter bots and thought it would be fun to work on something visual. Plus, I love emojis. I had seen a couple of similar projects before so I don’t claim to have invented this, but I thought it would be an interesting programming project and as far as I know it has never been done with animations so there was a new element to my implementation.
HOW IT WORKS
OVERVIEW
- Get the average color in RGB for every emoji
- Given an image, find the average color in RGB for a given area
- Find the emoji with the closest RGB score and place it in this area
- Repeat for the entire size of the image
It’s fairly simple, and getting it to work initially only took a few hours. The problem is that with larger images and multiple frames it can be very slow, so I spent a few days trying to optimize the code to the best of my ability so it wouldn’t take days to convert a bigger animation.
Those are the basics. For a more in-depth look at the code, read on!
EMOJI SCANNER
The Emoji Scanner is a tool that takes a directory of .PNG images of emojis (though really they could be images of anything) and produces a map of scores for each. This only needs to run once and the values will be stores in a .JSON file. Here’s what the entry for 1.png looks like:
{
  "emojis/1.png": {
    "red": 180,
    "green": 152,
    "blue": 131,
    "coverage": 72
  }
Here’s most of the Ruby code that produces the above score:
def scan_emoji
  @image.columns.times do |x|
    @image.rows.times do |y|
      pixel = @image.pixel_color(x, y)
      scan_pixel(pixel)
    end
  end
end

def scan_pixel(pixel)
  return if (pixel.opacity / 257) > 245
  @counted_pixels += 1
  @red += pixel.red / 257
  @blue += pixel.blue / 257
  @green += pixel.green / 257
end
scan_emoji takes an image and goes through each pixel one at a time. It runs this pixel through scan_pixel. If the pixel’s opacity is greater than 245 (basically, it’s transparent… not sure why a larger number is transparent but there you go) then it returns without counting the pixel. This is because while every emoji is 64x64, some of them have more transparent pixels than others. I wanted to only count non-transparent pixels for greater accuracy. Also, RMagick returns image information in 16-bit depth, so I divide everything by 257 to get numbers out of 256 which are easier to deal with.
The coverage data is simply the number of total pixels (4096, in a 64x64 image) divided by the number of non-transparent pixels that were counted. This is used later in the program, there’s a setting to prefer emojis with more pixel coverage over those with less.
IMAGE SCANNER
Once we have the average info for each emoji, we can take an image and scan it for average colors. Ultimately we end up with an array of coordinates and average colors in this format: Pixel = Struct.new(:x, :y, :r, :g, :b). The :X and :Y correspond to the top-left point of a given area, while the RGB values are the average colors for that area. The size in pixels for each emoji is constant and set at the beginning, so once we have this map all the program needs to do is plug in an emoji of that size at those specific coordinates.
def average_colors_for_area
  colors = { r: 0, g: 0, b: 0 }
  @emoji_size.times do |h|
    new_y = @y + h
    @emoji_size.times do |w|
      new_x = @x + w
      results = get_pixel_colors(new_x, new_y)
      colors = add_results_to_tally(results, colors)
    end
  end
  create_pixel_struct(colors)
end
Starting at coordinates of 0, 0 we move through a column by adding the @emoji_size, and then once we’ve reached the edge of the image we move down one row and start over. For a given area, we add each pixel’s red, green, and blue values to a running total, and then divide that number by the total number of pixels in the area to get the average values for each. Then a struct is added to the array of results and a new area is scanned until we’re done with the entire image.
EMOJI FINDER
This was the most important and most difficult part of the program, and I went through a handful of confusing iterations before settling on what’s currently in the repo. The Emoji Finder takes the data from the Image Scanner and, using the map of emoji colors we created earlier, finds the most appropriate emoji for a given area.
For a given pixel (the struct from earlier with RGB info) we do this:
def look_up_or_find_emoji(pixel)
  @done_pixels["#{pixel.r}#{pixel.g}#{pixel.b}".to_i] ||= find_emoji(pixel)
end
It checks to see if a pixel with identical colors has already been found, and if not, goes to this function:
def find_emoji(pixel)
  emoji = find_best_scoring_emoji
  @done_pixels["#{pixel.r}#{pixel.g}#{pixel.b}".to_i] = emoji
  emoji
end
We find the emoji with the best ‘score,’ add it to the hash for @done_pixels for retrieval later, and return the emoji’s filename. To find the best emoji, we do this:
def find_best_scoring_emoji
  scores = @map.min_by(@options[:coverage]) do |_, rgb|
    score_emoji(rgb)
  end

  return emoji_with_max_coverage(scores) if @options[:coverage]
  scores.first
end

def score_emoji(rgb)
  (rgb['red'] - @r).abs + (rgb['green'] - @g).abs + (rgb['blue'] - @b).abs
end
@map is simply the colors for each emoji as produced by the Emoji Scanner above. We use min_by with score_emoji to find the emoji with the lowest score, which is just the absolute difference between a given emoji’s RGB values and the @r @g @b variables, which are just the average color values for the current area.
The coverage option allows the user to prefer emojis with fewer transparent pixels. If this isn’t used the program will find the closest emoji by color and be done with it. If coverage is set to, say, 30, the program will find the closest 30 emojis by color and then use this function:
def emoji_with_max_coverage(scores)
  scores.max_by { |x| x[1]['coverage'] }[0]
end
Taking the top 30 emojis (as an example) this finds the one with the highest pixel coverage and chooses that. The result here is that the color isn’t quite as exact but the image will be “filled in” more.
IMAGE GENERATION
I won’t go too deep into the rest of the code as the above stuff is the most interesting (the rest is mostly just working with RMagick to create images and gifs), but I’ll summarize. Once we have a map of the average colors for given coordinates and we’ve found the most appropriate emoji for each coordinate we simply create a new image and add each emoji to this new image in the correct location. Then we write the new image to a file and voila, you have an emojified image.
For a gif it’s the same process as above, just with every frame of the input gif. We create temporary files for each original frame, and then a temporary file for each emojisaic version of the original frame. Once they’re all complete we stitch them together–making sure to copy over the original gif’s timing and delay information–and print the new gif to a file.
DONEZO
That’s a brief summary of Emojisaic! It was a ton of fun to work on and some of the gifs I’ve produced have been wonderful to look at. When I have some time I’d like to put it onto the web and let people upload gifs to be made into emojis. Someday…